Search This Blog

Amazon Store

Translate

Follow this blog with bloglovin

Follow on Bloglovin

Thursday, December 27, 2012

Piroulines with Cheese Filling

Piroulines with Cheese Filling


I was asked to make something for a party specifically a dessert type item, but didn't really have much time. So cookies was out. Not saying that these were didn't take any time, but it was less time and easier than making cookies in some aspects.

I bought these Jumbo Piroulines also known as Presidor Cannoli 


I used approximately 2 (maybe 3) boxes for one recipe, I bought 4 boxes not knowing how much the recipe would make.


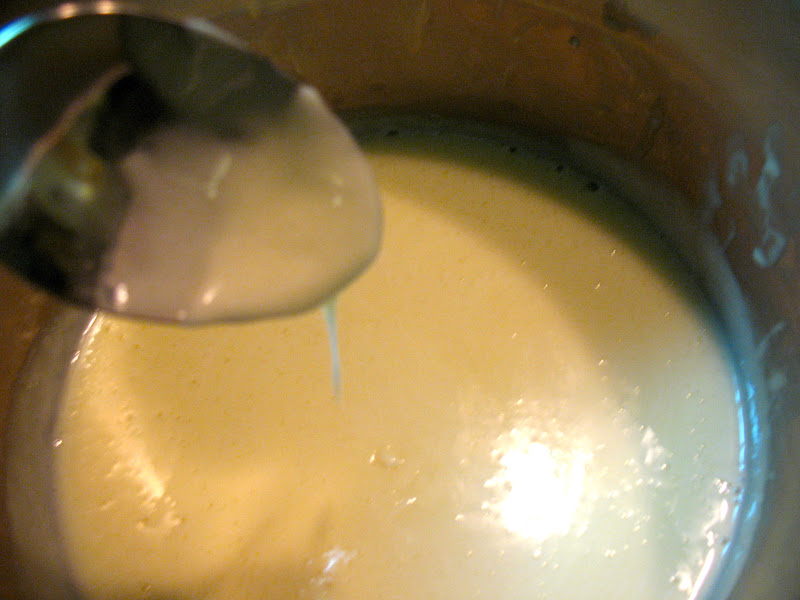
2 lbs ricotta cheese-drained-you want it really dry, I squeezed it through a cheesecloth, then switched it to colander and let it drain for approx. 48 hrs in the fridge and then dried some more wet spots with a paper towel. Original recipe says to put in colander and drain overnight-mine wasn't dry yet, so I left it in longer, so more water can drip out. 

Put cheese in bowl, add confectioner's sugar-no amount-it's too taste-some ppl like sweeter and some less sweet. Recipe calls for 1 Tbsp vanilla extract and/or amaretto liquor. I just put in vanilla. Optional: orange zest or lemon zest. Beat until creamy. Mix in some chocolate chips-also doesn't have an amount, you want to put in enough that there should be about 2, but no more than 2 chips in each shell. 

Fill the shells, I used a spoon and the handle of the spoon to push it in, to eliminate air pockets.

I originally was going to pipe them in and make them look all fancy, but I realized they would get messed up on travel and I was running behind schedule as it was. 

Optional: You can dip the ends into chocolate and sprinkle on nuts or other toppings. This is totally unnecessary, but just sharing the options.


They were plated nicely by the party,
this was for transportation purposes
I lifted the aluminum foil to give you a peek
These were all gone, not one left, my family didn't even get to taste, and it wasn't a huge party. I heard many people ask for these, and then for another one and yet another and another.

Wednesday, December 26, 2012

Fun Pizza Bites


Fun Pizza Bite

A little while back, I posted about pizza pockets. Here's a fun take on those. Get out your cookie cutters,  and cut two of the same shape out. Spread one with sauce and then put on toppings. I would roll the dough out thinner next time, I was a bit rushed that day and also would use mozzarella cheese rather than American, hey I was using what was in the house. Top with the second shape using a fork to seal the edges. Bake until  a light golden brown, time will vary depending on your pizza recipe.  Yummy! Great for picky eaters.

Wilton 2304-1050 101-Piece Cookie Cutter Set


Simple, triangle turnover-no cookie cutter

Yummy !

Tuesday, December 25, 2012

Hasselback Potatoes


Hasselback Potato

These potatoes are are awesome and look so pretty. The options are endless. Choose your herbs and mix on, go with whatever toppings strike your fancy. I will admit that I had a bit of a hard time, cutting the slits in the potato and making sure it didn't come apart. I've seen some tips that included holding a wooden spoon next to the potato, not under it when cutting, but the rest wasn't clear, so if anyone has any tips on how to cut it and keep it looking nice. Please share. Another tip, I saw included rinsing the potato under cold water to help it fan out. This possibly was helpful. Not sure though.

Thinly slice scrubbed potatoes making sure not to cut all the way through. I kept mine simple and brushed olive oil onto all the exposed potato and then sprinkled on salt. Bake at 350 for 1 hr.

Scrubbed Potato

Bit hard to see, but there's narrow slits in the potato,
 left side looks thick, but has multiple thin slits

After rinsing under cold water and putting on Olive oil and salt


All Baked Crispy and Toothsome

I added some cheese when it came out and the heat of the potato melted it. Yep, that's how you do it, when you don't want overdone cheese.

Monday, December 24, 2012

Forever Red Exclusively at Bath & Body Works


At first I told you I couldn't quite place the smell of this perfume, but the description says it's a "luxurious blend of pomegranate & red osmanthus with a sexy surprise of vanilla rum, for a forever enchanting way to fragrance."

I still like the smell, still can't identify those smells, now that I know what's in it. I do like it though.

I sprayed it on my wrist and rubbed my wrists together. When I walked by my little brother, he asked if I was wearing perfume?

I responded "Yeah, why you don't like it?"

He responded back "Actually, I do."

Ultimate compliment.

I liked it and it doesn't irritate others, you know those obnoxious smelling perfumes, or the ones that close up your airways. That noxious stuff should be illegal.


Other reviewers did say that the smell wore off pretty quickly, mine lasted all day, I didn't have that problem.

I definitely recommend this perfume.


This perfume is sole exclusively at Bath and Body Works
http://www.bathandbodyworks.com

I received this perfume complimentary from Influenster as part of the Cosmo VoxBox program, all opinions are mine and are completely honest.


Influenster Cosmo Vox Box

A small box came in the mail recently filled with wonderful surprises.


Frixion by Pilot Pens: $4.50 for a 3 pack/ $11.00 for a 8 pack

Pens always come in handy, but these pens are even more amazing, they have a rubber tip which erases using friction. They sent me one with purple ink and one with blue ink. I have used erasable pens in the past, and wasn't very happy with them. I was pretty happy with this one though. The ink is not as consistent as regular ink, meaning there will be parts where it's lighter. Also sometimes you may have to erase a little harder to completely erase. I also wish they had put the eraser on the cap because when I'm writing, I cap my pen with the pen cover and don't want to have to take the pen cover off, in order to erase. That being said, I would still recommend these pens.


My notes with the erasable pen, click on picture to see it bigger.


Ghirardelli Gourmet Milk Sea Salt Escape: $2.79

Unfortunately, due to dietary restrictions this chocolate was a tease for me. I have heard Ghiradelli makes fabulous chocolate. I shared this with friends and this is what they said:

"It's so good!"


"A person can never have to much chocolate! Of all the chocolate i have even eaten, Ghirardelli Chocolate takes the cake. Their Sea Salt Escape chocolate felt so smooth on my tongue as it slipped down my throat. The smell was strong cocoa aroma and the taste was salty sweet. As i chewed the almonds the crunchiness of the nuts and the smoothness chocolate melted together. I enjoys licking my fingers as I finished the chocolate in  my hands." 


Venus Razors $3.50-$4.50 per month for blade refills

Gillette Venus Embrace: These razors have the closest shave and minimize nicks.
Gillette Olay Razor: These lock in moisture and glide very smoothly.

Forever Red Eau de Perfume Exclusively at Bath & Body Works: $10.00 for .25 fl oz/7 ml /44.50 for Full Size

I'm not really a perfume type of gal, but was pleasantly surprised by the light, non-overbearing pleasant smell that I can't quite describe from Forever Red by Bath and Body Works. I would totally recommend this scent.


Disclaimer: While all opinions are completely honest. I received these products complimentary from Influenster. 

Monday, November 26, 2012

Gift Giving Season Has Arrived


I'm going to bring up a topic that I've brought up before. Because I feel it's important. Because you can be getting money back. I don't understand why more people aren't doing it.  No it's not a scam, I have cashed checks from them. 

Let's see, you have along list of gifts that you need to buy for the upcoming holidays. You have to buy essentials, like clothes. Fortunately no one has ever actually tried to give me clothes as a gift. Or maybe a coffee-maker is essential for you to start your day off right. Now, what if I told you, that you could save more money than you already are. Yep, in addition to coupons.Whatever you need, before you shop, go to EBATES. Make an account. It would be very foolish of you not to make an account. You shop these stores anyways, to make it even easier, they have a browser app which you can install to your toolbar. Best thing ever, you won't even have to go to EBATES and click through them. If EBATES is associated with them, there will be a pop-up which you have to click to apply it to your order. EBATES will apply a tracking ticket to the sites you visit. If you make a purchase, you will get a whatever percentage that store is offering back. GO CHECK IT OUT NOW! I don't think I'm usually so forceful, compelling, or commanding. But what I don't understand is why people have not started using it. I thought everybody likes to save money and find the best deal. The voice of Unique Heart has spoken.


Check out:


EBATES-online rebates and nothing to mail.

The way this site works is that they have a list of stores, that offer you a percentage back. Let's say your kid needs clothes. Go to EBATES and click on the clothing category. You will see a list of clothing sites with the percentage back that they are offering. Let's say you usually shop at Land's End. Scroll down the list of sites to Lands End and click shop now. An EBATES tracking ticket will pop open and take you to Land's End. Some sites even offer coupons in addition, just click on the store name before clicking shop now. Once you purchase an item, EBATES will send you a check or you can get it through paypal or even have it given to charity. What's not to like? Try it now, it's totally FREE to sign up and if you need to spend money, why not save while you're at it. 


P.S.- If for some reason the above is not compelling enough,  but later on you decide to join or some friend convinces you better than I can. Then you can always come back and on my sidebar, there is a link which will take you straight to EBATES

Friday, November 16, 2012

Macaroni with Cheese Sauce Part 2

I was really in the mood of pasta today. I wanted either baked ziti or macaroni with cheese sauce. I ended up going with macaroni and cheese sauce for various reasons.

Macaroni and Cheese Sauce is quite easy to make, but there are no measurements.


Ingredients Prepped: Milk (works with any fat content),
American Cheese, Penne-can use other pasta shapes as well

Cook up the macaroni to your desired doneness.
In a small saucepan, pour  a bit of milk and add American cheese. Stir until you have a thick sauce. The thickness of the sauce depends on your preference, I like it a bit thick, but not too thick, if it gets too thick, add milk. Test it by dipping one noodle in the sauce and tasting.

cheese sauce

trying to give you an idea of the thickness of the sauce
I like it as is, but you can add nutmeg or even a little black pepper to the sauce.

Spoon sauce over pasta. There's more control this way, in the pictures mine has too much sauce for me at least, and that's because I dumped the pasta back into the pot with the cheese sauce. Obviously if you have a better eye for these things, or are making a lot more pasta than I did, it will work to put it back in the pot. My recommendation is to spoon it over. Also this time, I used the same pot for the pasta and the cheese sauce, but I sometimes use a saucier or a small saucepan-it depends on how much I'm making.

Remember, I told you I dumped the pasta back into the pot,
and didn't spoon it over, too much sauce for me (you can see it along the rim of the plate)
Ready to eat now.


Easy Alternate Version: Here is where you get to see my kiddie taste buds, I sometimes put some ketchup on top of the pasta with cheese sauce and mix it together.

added ketchup, it's orangish along the rim near the bottom,
because I tried it first over there,
to decide if I wanted to put ketchup on

Mixed in the ketchup
Delicious

See Creamy Mac N Cheese Part 1 for a comparison between these 2 versions, or try them both for yourself and let me know how you like it in the comments section below.

All-Clad Stainless 2-Quart Saucier Pan


See: Mac N Cheese Part 1


Wednesday, November 14, 2012

Creamy Mac N Cheese Part 1

Saw a recipe on pinterest for macaroni and cheese recipe that boils the pasta in milk. Boiling pasta in milk sounds good, doesn't it? I had some time, so decided to try it, but I adapted the recipe a bit. Googling it, turns up quite a few versions, which are all pretty much the same, I used this one:
http://heavenlyhomemakers.com/high-five-recipe-creamy-mac-and-cheese
The idea is that the starch that's released from the noodles thickens the sauce and the milk makes it creamy and if you ask me, evaporation helps to make it thicken.

I filled up pot with milk, added the pasta, cooked it for 15+ minutes (pasta wasn't cooked after 15 minutes, I think it took more like 20 minutes for me). Didn't have shredded cheese, so tore up American Cheese Slices and added that, till it seemed thick and creamy enough.


Creamy Mac N Cheese
with bad lighting, but I think you get the idea of the cheesiness and it's potential awesomeness,
if  you don't find it too sweet like I did


So here was my take on it: Not bad, a little too sweet for me. Prefer my version which has a similar effect with less work and much faster.


This Version:                                                                            My Version:

didn't like, too sweet                                                                 Flavor is not too sweet, just right
too long to make                                                                       Whips up pretty fast
stir constantly 10-15 min or in my case even longer                 Not stirring pasta constantly

              some people may like it                                                                 I like it


Since this is similar to my version, I think I will stick to my version because a) I like it better and b) it's quicker (at least it seems like it-didn't actually time it to the second)

Stay Tuned for Part 2 with my version-coming soon-I call mine Macaroni with Cheese Sauce.

Here it is Mac N Cheese Part 2


Monday, November 12, 2012

Scrambled Eggs with a Twist

Eggs are delicious. Yes, I'm not a vegetarian or a vegan. I like eggs. Eggs are good with dill dip, eggs are good with turkish salad. Eggs with turkish salad reminds of a shakshouka dish, just based on the ingredients because I've never had shakshouka, although I've been wanting to try it for quite some time.

Although the dish was delicious, I would put less turkish salad in next time. So the turkish salad was leftover in the fridge. I pulled it out and dumped it in the pan, let it heat up a bit, until it was sizzling, dumped the beaten eggs that already had salt and pepper in it and cheese in the pan. I was going to leave it as an omelet it would have been so pretty, but I realized the egg would get too cooked for me ( I like my egg just cooked), so I scrambled it. I'm also thinking I probably could have reversed the order I put in the ingredients.

Heating up turkish salad

see those tiny bubbles=hot

dumped in the beaten egg mixture=pretty

scrambled it=delicious anyways


Wednesday, November 7, 2012

Pineapple Flowers


 Do you know those pinterest fail blogs, the ones where they try pinterest pins and then let you know it didn't work. I actually thought I had also pinned this to try, but I couldn't find it on my board. Even though my pics are lousy, I don't think this was a fail. One of the comments on the fail blog, said that this worked for her, since people did have success with it, when I saw a family member cutting up pineapple, I cut one thin slice. The original instructions are here. I followed the instructions from there. They were a bit moist still too, so I could have probably dried them out a bit further-if I kept a close eye on them I didn't put it in a cupcake tin to dry overnight to get the flower shape, since it seemed to me that it wasn't a fail and was just testing technique, the flower was bright an pretty, although the edges did get a bit tan. Apparently it was also delicious. So I guess pinterest failers are lazy!


Monday, November 5, 2012

Deep Dish Chocolate Chip Cookie and/or Cookie in a Mug

Hurricane / Tropical Storm/ Frankenstorm Sandy gave me the opportunity to try somethings, here's one and some more coming soon.

Are you in the mood of just one cookie? Hate spooning out each individual cookie-yeah that's the part I hate about cookie baking too.

This recipe lets you have 1 cookie in just a few minutes. This recipe doesn't beat my regular chocolate chip cookies, but it works for when you just want one cookie or something sweet quick. Out of the 5 people surveyed, including me, the following were the responses to this cookie (in no particular order):

Person 1- Pretty good, not awesome.
Person 2- Good
Person 3-Ok
Person 4- Yummy, I'll have some more and finish it if you'll let me
Person 5- Yummy, I'll have some more and lick the mug clean

So 3/5 people LIKED IT
1/5 thought it was OK
2/5-YUMMY

Out of 5 people surveyed, no one thought it was bad. I had found the recipe over here. When I go to the original recipe, there are slight changes, for example it's a little less than 1/4 C flour and just mix everything in the cup. Although the second recipe may not have mixed everything in the dish because she used ramekins. Doing it the second way worked for me and people liked it, but it's possibly even better the 1st and original way, if and when I get around to trying it, I'll post it. Now someone just has to find me a similarly quick recipe to use that egg white and please don't say scrambled egg whites, macarons, or meringues unless they are like as quick as this recipe.

So here's the recipe:

from the original source.


Chocolate Chip Cookie in a Cup 
created by Melissa at No. 2 Pencil 


1 Tablespoon Butter

1 Tablespoon Granulated White Sugar
1 Tablespoon of firmly packed Dark Brown Sugar
3 Drops of Vanilla Extract
Small Pinch of Kosher Salt
1 Egg Yolk (discard the egg white)
Scant 1/4 of All Purpose Flour
2 Tablespoons of Semi Sweet Chocolate Chips

Start by melting your butter in the microwave. Add sugars, vanilla and salt. Stir to combine. Separate your egg and add the yolk only to your cup. Stir to combine. Add flour, then stir again. Add the chocolate chips, and give a final stir. Cook in microwave 40-60 seconds, start checking for doneness at 40 seconds. Mine takes 50 seconds. 


Serve warm.


*UPDATE-I've since made this a few more times and given it to an additional taster. I've a learned a few things, the butter/margarine can explode when melting in the microwave, so do it for a few seconds at a time, and open the microwave door, I'm assuming it becomes like a pressure cooker. A quick google search shows that I'm not the only one having this problem, and maybe I should have warmed my butter/margarine first or let it at least come to room temperature. So one time, my margarine exploded all over, and I tried to make the recipe anyways, with that attempt I also just mixed all the ingredients together, not in the order it said, 'twas a failure. Then I made it again-had a slight explosion in the microwave-I think I opened the door just in time, didn't lose too much of the margarine, mixed things the way the recipe said, but (here it comes) forgot the brown sugar, I did take it out after 10 seconds in the microwave when I realized. But the cookie was already starting to bake, and therefore I couldn't add the brown sugar. It only took 40 seconds in my microwave, same time as the first ttime I made it. Results: Yummy (so don't worry if you forget that bit of brown sugar.)

I tasted a spoonful, and wanted more, but taster was intended recipient and wasn't sharing anymore. Taster was on the Yummy category.

Sunday, September 9, 2012

Free Pasta Server

Like Presto's Pizza on Facebook to receive a free Pasta server only valid until September 11th, 2012.

Wednesday, September 5, 2012

Quick Cereal Bars

School is starting soon or has started already and it's back to those crazy rushed mornings. Some folks might be inclined to skip breakfast.

Hey! That's the most important meal of the day. So if you're rushing out the door and need a quick breakfast, try these cereal bars. They're not the most healthy, and you'll need to grab a banana or yogurt with it. But it's better than skipping breakfast altogether.

You will need:
1 serving of your favorite cereal-I used multigrain cheerios
3 Tbsp mini marshmallows (original recipe calls for 2 Tbsp)
cooking spray


Spray a microwave ball with cooking spray. Put the cereal and marshmallows in the bowl. Microwave for 30 seconds. Stir.


Original recipe said to wait one minute and shape into rectangles with wet hands. I was able to shape mine with dry hands and with no waiting period.


wrapped in saran wrap


So easy kids can do this!

I found this fantastic recipe idea here. Her blog is incredible!


-------------------------------------------------------------------------------------------------------------------------------

This site has a whole list of things you can do with empty cereal boxes-check it out-my fave is the notepads craft:

Saved By Love Creations


Great for when you're in a rush. Just keep the bottom milk part in the freezer, so it's ready to go when you're in a rush. I bought one a few years ago and we liked it so much, we bought more. They weren't easy to find.

Tuesday, September 4, 2012

Pizza Pockets

This is a really yummy lunch or snack idea. If you don't have a sandwich maker, they  are pretty inexpensive. I like the ones with the partitions.


I recommend this one, if you're going to be purchasing one, triple the functionality, this one has 3 interchangeable plates, sandwich maker plate, grill plate and waffle plate. Awesome!


we don't have this brand, but we do have a 3 in One.

or you can make it in the oven, although it won't be quite the same.


Pizza Dough-You can use your favorite recipe or use this really easy one that I used
1 C. lukewarm water
1T. instant yeast
1/2 t sugar
1 t salt
1/4 C. olive oil
2 1/2 C. flour

Mix yeast with flour. Add rest of ingredients & beat well. Knead in more flour ( you have to use your own judgement here-do it by feel, the dough should be elastic & soft, not too dry. Let rest 15 minutes.

Sauce-I used Barilla Marinara
Cheese-I used Shredded Mozarella
Optional: other fillings of your choice: meat, olives, peppers, tomatoes, spinach, etc.


Take pizza dough and roll it into a square of dough about the size of a square slice of bread. Roll out another square the same size.

(Optional: slightly bake the dough for a minute or two-I skipped this step)


one square

2 squares approximately the same size

 Spread sauce and sprinkle on cheese on one square. Place square on Sandwich maker. Take second square and place on top. Let the sandwich maker do it's job-you should end up with 2 pizza pockets

spread sauce on dough-mine could have used  more sauce

and  more cheese-here it's on the sandwich maker ready to be assembled


put the square with just sauce over the other square.
SEAL by pressing the edges of the dough together with your finger
to make it look even fancier, after pressing down, seal again with the tines of a fork


Close your sandwich maker, if you have a 3 in one
make sure it's set to sandwich, if you want it a bit crispier,
 then set it one number higher
it's cooking.
The sandwich maker will turn off or click when it's done.

It's ready, you can break/cut it in half & serve
Yum!
Someone wasn't very willing to let me get a picture,
 they wanted to eat it NOW!

Ideas for Sandwich Maker:

I have not made any of these, except the one they call pizza pockets with the bread. I do think the second link is a lot more creative with their use of the sandwich maker.

http://community.tasteofhome.com/community_forums/f/30/t/136055.aspx

http://voices.yahoo.com/ideas-using-sandwich-maker-536951.html


Follow this blog with bloglovin

Follow on Bloglovin
Related Posts Plugin for WordPress, Blogger...