Search This Blog

Amazon Store

Translate

Follow this blog with bloglovin

Follow on Bloglovin

Sunday, August 28, 2011

Organizing Recipes

I kept coming across recipes that I would want to try and I would copy it into a document. The problem with this was that I ended up with a whole bunch of documents called Recipes, Recipes to try, Recipes2 and so on. I needed a more organized way of being able to try recipes. One method that I use is having a folder on the computer called Recipes-inside that folder I have 2 subfolders-one is recipes to try and the other one is tried and true recipes. If I make a recipe and it is a hit, it gets moved into the tried and true folder, other recipes get deleted. If I was even more organized, I would have it sorted by the type of dish-soups,  salads, mains, etc. My recipe box is pretty organized, so I figured it might be more useful for me to have cards. I'm going to make a section for recipes to try in the back and if they are good, they'll be filed under the appropriate letter.

Printable Recipe Cards
 I opened a word document and placed a square from the shapes. I would then double click until format auto shape box popped up and I would set the size. My recipe box is for 3 x 5's  so I set the height for 3" and the width for 5". if you have a 4 x 6 or even a non standard size just enter those numbers. Now you have a rectangle with your desired dimensions, right click and click on add text. Now you can jut copy and paste the recipe into the box.

Optional: You can add pictures or borders for cutesy cards. I chose not to because it takes up valuable space, but it would be okay for short recipes.

Print the recipes out, if your printer can handle a thicker paper , print on that, or you can paste it onto thicker paper or just leave it.


You can purchase supplies for various projects featured on this blog here

Friday, August 26, 2011

Tracing Images or Transferring Method

This method works,the image will be a little on the faint size, but sometimes that's a better thing.

Here's how to do it:

Prepare your image that you wish to trace/transfer.

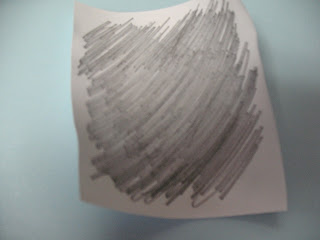
Take a graphite pencil and scribble a piece of paper the same size as your image until it's full of graphite.


scribbled with graphite

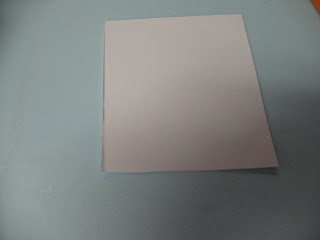
Now, place your blank piece of paper on the table.

blank piece of paper

Take the piece of paper you scribbled all over and place it face down on top of the blank piece of paper.
graphite paper placed face down
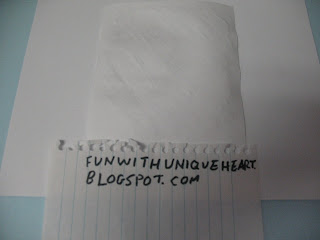
Now take your image that you would like to transfer and place it on top of the pile-face up.
all ready to go

Now take the pencil and applying pressure trace your image.

traced and applied pressure with pencil
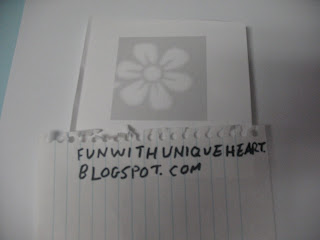
Lift off the top 2 papers to reveal your transferred image.


You can purchase supplies for various projects featured on this blog here

Wednesday, August 24, 2011

Magazine or Junk Mail Art

This is a simple craft and it's quite likely that you have most of the materials on hand. That's a win in my book. This craft can be used to write out a name, make banners or even a pretty picture of something.


First you need to plan your image-you can do letters, names or any simple pictures.

Now you will need to cut out that image using an xacto knife, in my case I did the letter S.

My knife didn't do such a neat job
Cut out strips of magazines in your desired colors, these strips should be very thin.
I chose these colors
Using a glue stick-glue the magazine pieces onto a separate piece of paper. make sure the strips are slightly overlapping each other.


Once the entire paper is filled up with strips of magazine, cut off the excess and glue stick the paper with the image cut out of it on top.

the colors seem a little off here, it's very pretty in real life


Enjoy your gorgeous piece of art.

If you think your kids might be too little for this craft, here's another way to have your kids create a similar masterpiece. Cut the strips for your child, you may want to make them a little wider. You can either let your child place the glue on the paper or you can do it for them. Have them place the paper on the glue-it doesn't have to overlap. Take scrapbook punches and punch another paper in the area where the magazines are. Then glue it on top.

 You can get a good scrapbook puncher here.

Another option would be to use scrapbook punches to pop out the magazine instead of making strips.

Supplies for various crafts posted on this site can be found here:

http://astore.amazon.com/funwitunihea-20


Linking Up at:

Tuesday, August 16, 2011

What Should I Read Next


Do you ever finish a series and are disappointed that it’s over? Are you wishing that there are similar books out there? Maybe you are just looking for recommendations on what to read?

Guess what, What Should I Read Next is here to the rescue. All you need to do is put in a title or author you enjoy. Then click on one of the book results and you will get  a list of book recommendations. How cool is that?

I entered Cecilia Ahern (she’s great author, you should check out her books if you haven’t already read them.) The search engine returned 2 results, so I clicked on the top one which was “P.S. I Love You” and it gave me this list-

Here are the results for
PS, I Love You
by Cecilia Ahern:

Title
Info/Buy
GREGORY PHILLIPA - Other Boleyn Girl, the

Jodi Picoult - Salem Falls

Judy Blume - Summer Sisters

Jane Green - Jemima J

Kate Jacobs - The Friday Night Knitting Club

Marian Keyes - Lucy Sullivan Is Getting Married

Sophie Kinsella - Remember Me?

Sophie Kinsella - Shopaholic and Baby

Sophie Kinsella - The Undomestic Goddess

Sophie Kinsella - Can You Keep a Secret?

Marian Keyes - Watermelon

Nicholas Sparks - Dear John

Lewis - Magicians Nephew

Sophie Kinsella - Confessions of a Shopaholic


Now I have a list of books to check out.

You can even sign up to save and delete items.

What’s your favorite book(s) or author(s)?


Don't forget to check out my My Amazon Store for supplies for any of my posts.


Monday, August 15, 2011

Paper Cups

This is a very easy project. It's an origami project, so you will need origami paper which can be purchased here under crafts. You can also check out products related to other posts on my blog here. There are a few types. If you want a bigger cup, get the bigger paper. These cups can hold a variety of things, popcorn, seeds, beads-you name it. It's also worked to hold a drink of water, although no more than a cup or 2. If you choose to use it for food or beverage-these will need to be disposed of. But fear not, for these cups don't take long to make at all. So whether you just need a craft or a container, these paper cups fit the bill.

Start with a piece of origami paper, mine has a fold in it,
because I already did the next step, and had forgotten to take a picture


That's it, you have just made a paper cup. Decorate it however you would like and fill it up.


Linking Up At:

The Girl Creative


http://makingtheworldcuter.com


Sunday, August 7, 2011

Sun Prints with a Twist

My camera returns and when it goes on vacation it means it. I mean it didn't do any work, so there are no new pictures on it. Anyway, while he was on vacation, we made a sun print. Also someone was inspired by the chalk mickey mouse. He made about 5 of them, and they came out very good. I can't show them to you because the rain washed them away while a certain "something" was on vacation.

Sun Prints are a fun project. We took a doily, a rectangle one, because it was bent. Taped the doily over black construction paper. The construction paper is key here. I most likely could have used a different color paper, as long as it was construction paper.


Found a stone to hold it down, put it over the doily, but not covering any holes. Left it outside in the bright sun. Came back a few hours later, to find it had blown away despite the stone, but the job had basically gotten done. I stripped off the doily to find a beautiful design.

Some ideas for your doily sunprint


Just playing around with Picnik, envisioning it in purple
little girls courtesy of google images


Linking Up At:


Monday, August 1, 2011

My Camera is on Vacation


I'm on vacation


My camera has decided to take a vacation and it didn't even bother telling me. I don't know where it's gone.  It couldn't even be bothered to shoot me an email.  Not only that, but I've taken it on vacation before and it didn't take me on vacation. :( Not nice.

Hmm...

I just got an email that his friend Flip is willing to take him over, or I could use Google Images. Neither of which is ideal. I mean Flip has some positive qualities, but doesn't actually fit all the qualifications needed for this job. Since I have no one else, I guess he'll have to do. I hope everyone will understand about the lack of or decrease in pictures.

I'm missing it. I hope it comes back soon. I wonder if it will have some pictures to show me of its vacation?


Follow this blog with bloglovin

Follow on Bloglovin
Related Posts Plugin for WordPress, Blogger...